PiRetrocade Assembly Guide
 LightningHawk
 PiRetrocade
Pew-Pew. Got you. The Raspberry Pi 3 has been the latest and greatest in the line of Raspberry Pi Single Board Computers. Need some inspiration for your next Raspberry Pi project? How about a retro arcade gaming kit?
Kit Includes:
- 5x Arcade Buttons
- 1x Joystick
- 1x SD Card with Porta Pi
- 20x Female quick disconnects
- 20x 6-inch M-F Jumper Wires
- 1x Utility Knife
- 4x Screws and four nuts
Covered in This Tutorial
This guide aims to get you up and running with your PiRetrocade in no time. Thanks to the included micro-SD Card with the emulation image installed, setup is quick and requires no programming! This guide in conjunction with the video below will guide you through the assembly of the PiRetrocade, so you can get gaming.
Materials Required
The following is additional supplies you'll need that are not include in the PiRetrocade Kit.
- Raspberry Pi 2 or Pi 3 (This tutorial uses the Raspberry Pi 3 Model B)
- Power Supply
- Wire Strippers
- Crimp Tool
- HDMI Cable
- Monitor
- optional powered speakers or headphones
Suggested Reading
Before building your PiRetrocade, you may want to read some of the tutorials below if you're unfamiliar with the Raspberry Pi. You do not need to have any previous experience with Raspberry Pi to build and use this kit.
SD Cards and Writing Images
Preassembled 40-pin Pi Wedge Hookup Guide
Raspberry Pi 3 Starter Kit Hookup Guide
Kit Assembly
For step-by-step instructions on how to assemble the PiRetrocade, watch the video below. Then read on for more detailed instructions.
Hardware
This project really boils down to five buttons and a joy stick connected to the GPIO pins on the Raspberry Pi 3 and an SD card fully loaded with arcade software. Let's get started building this controller. Insert the SD Card into the Raspberry Pi . On top of the box, you will find blue prints for your controller layout. Use the provided hobby knife to cut holes labeled "Cut".
Buttons
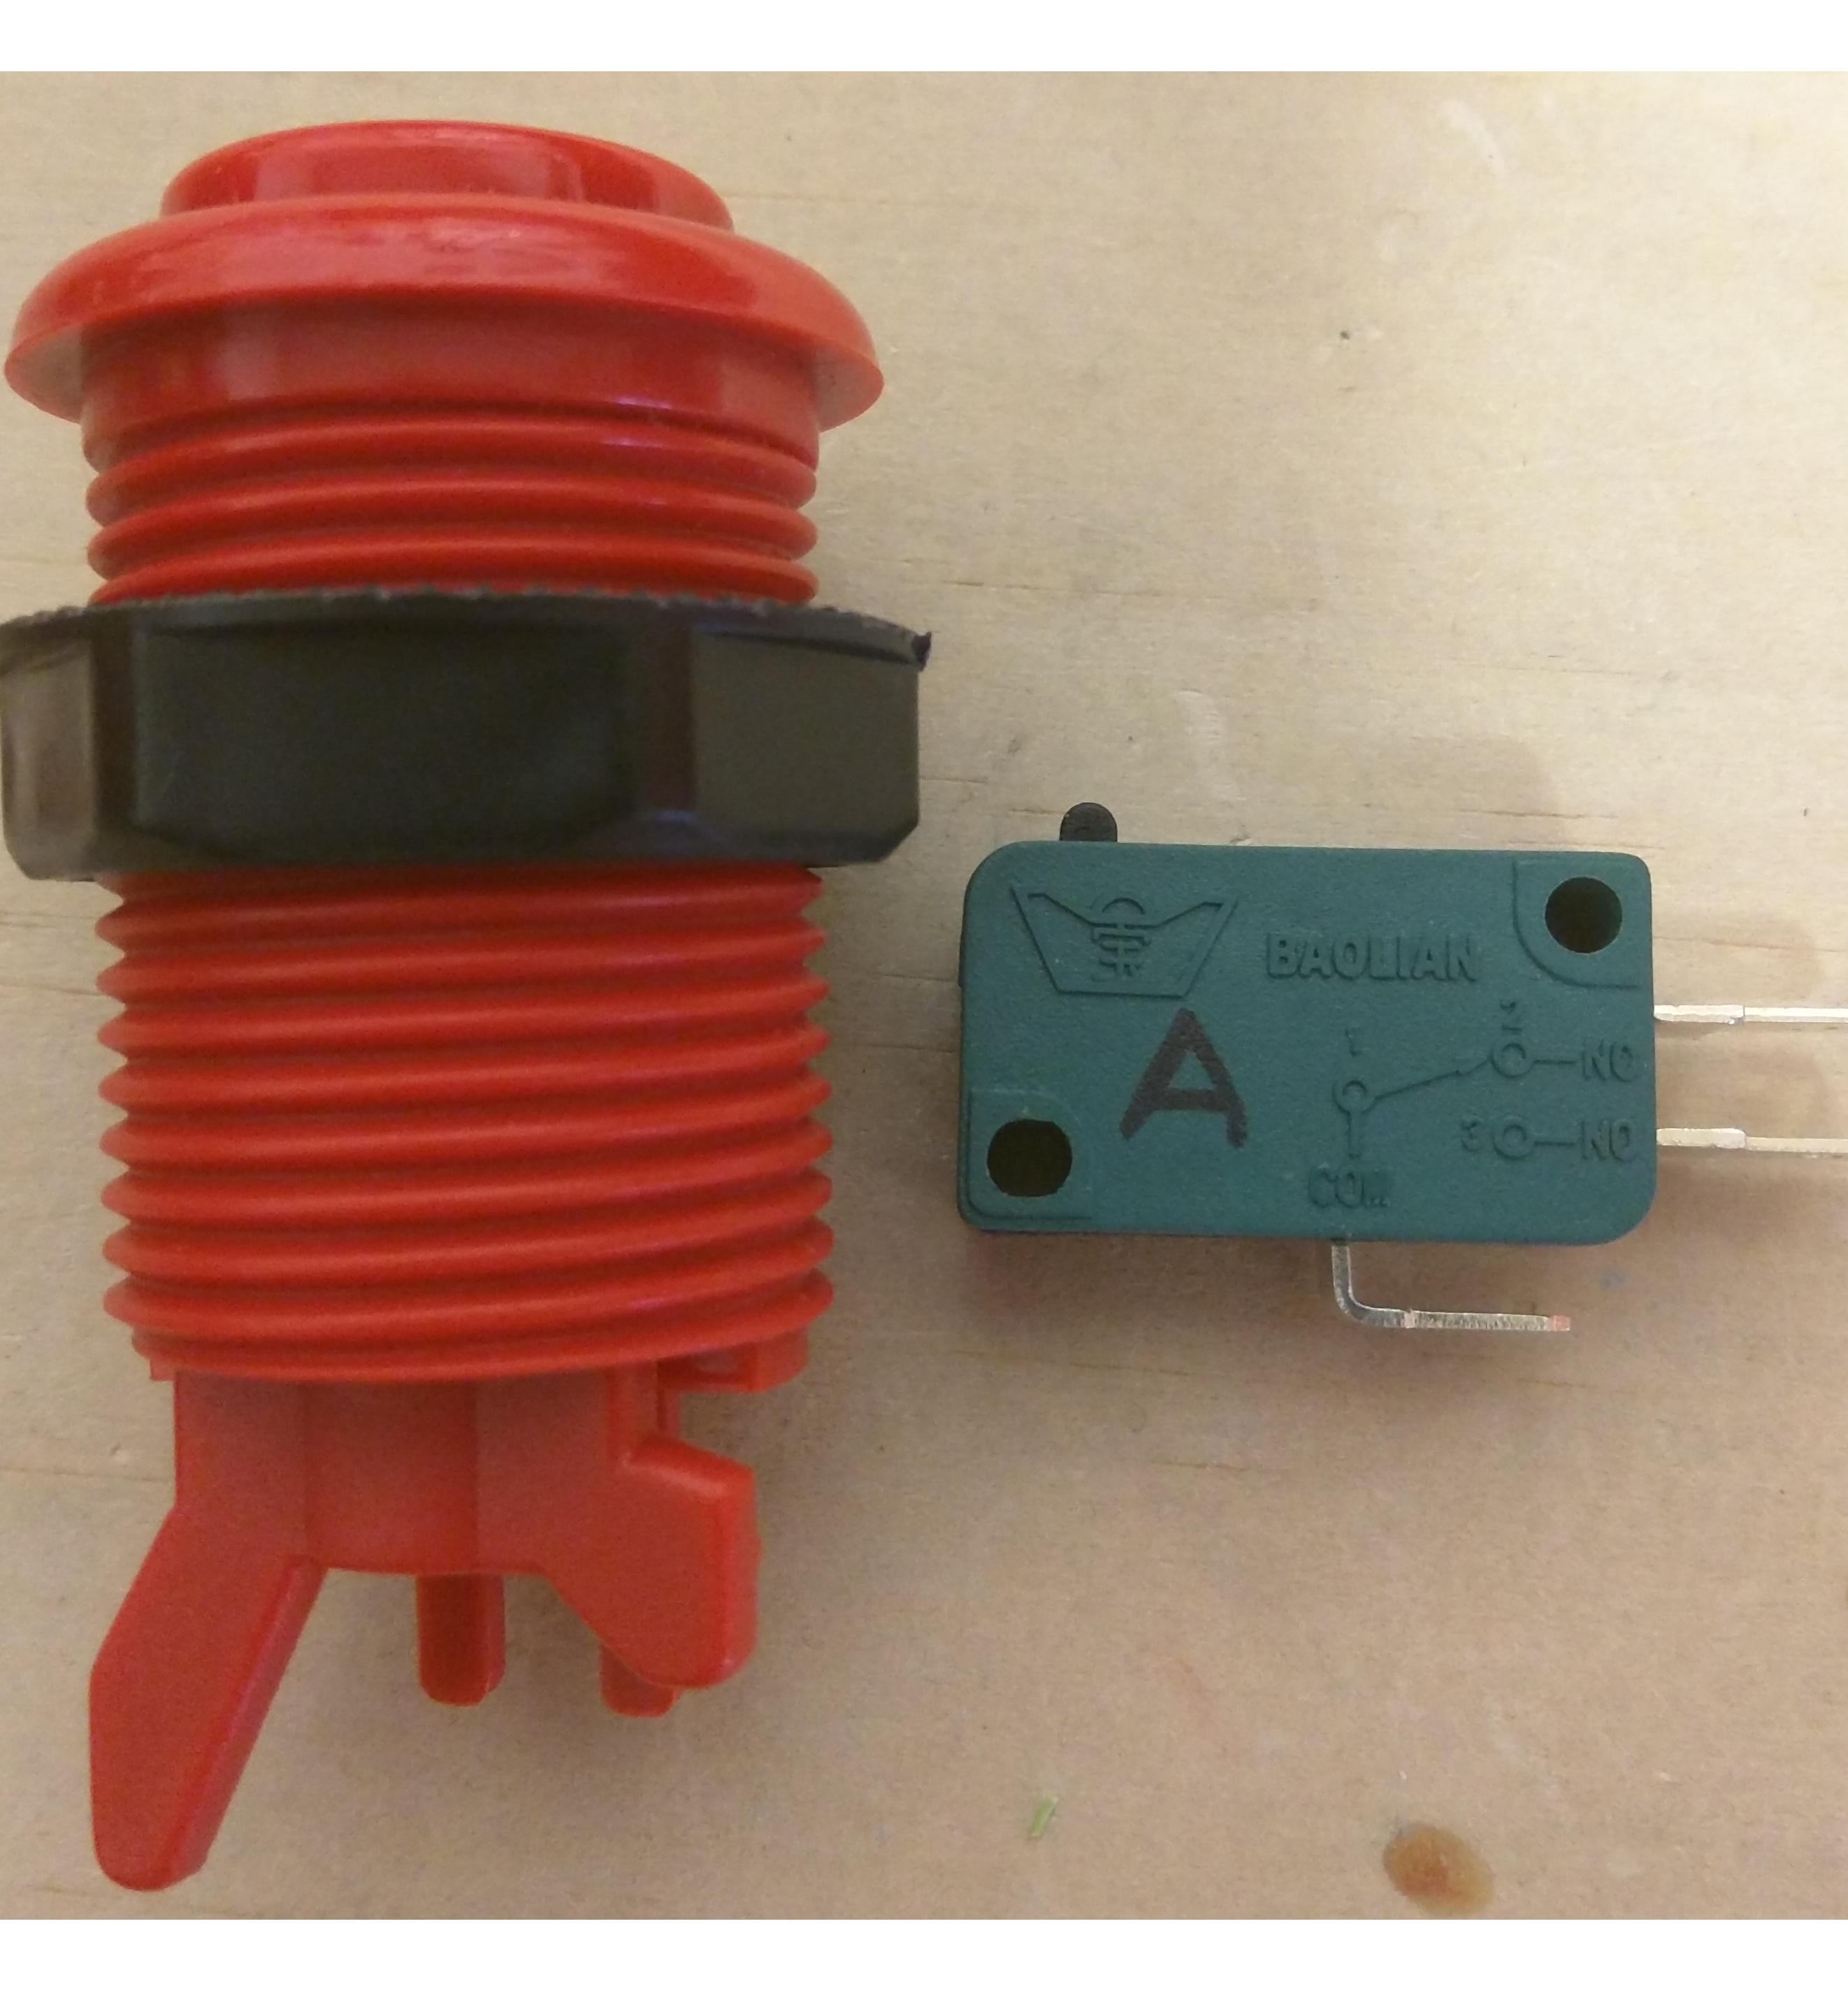
Remove the switches from the arcade buttons. Unscrew the nut, and feed a button through each hole and secure the button to the box with the nut. Once they are all in place, replace the switches.

Joystick
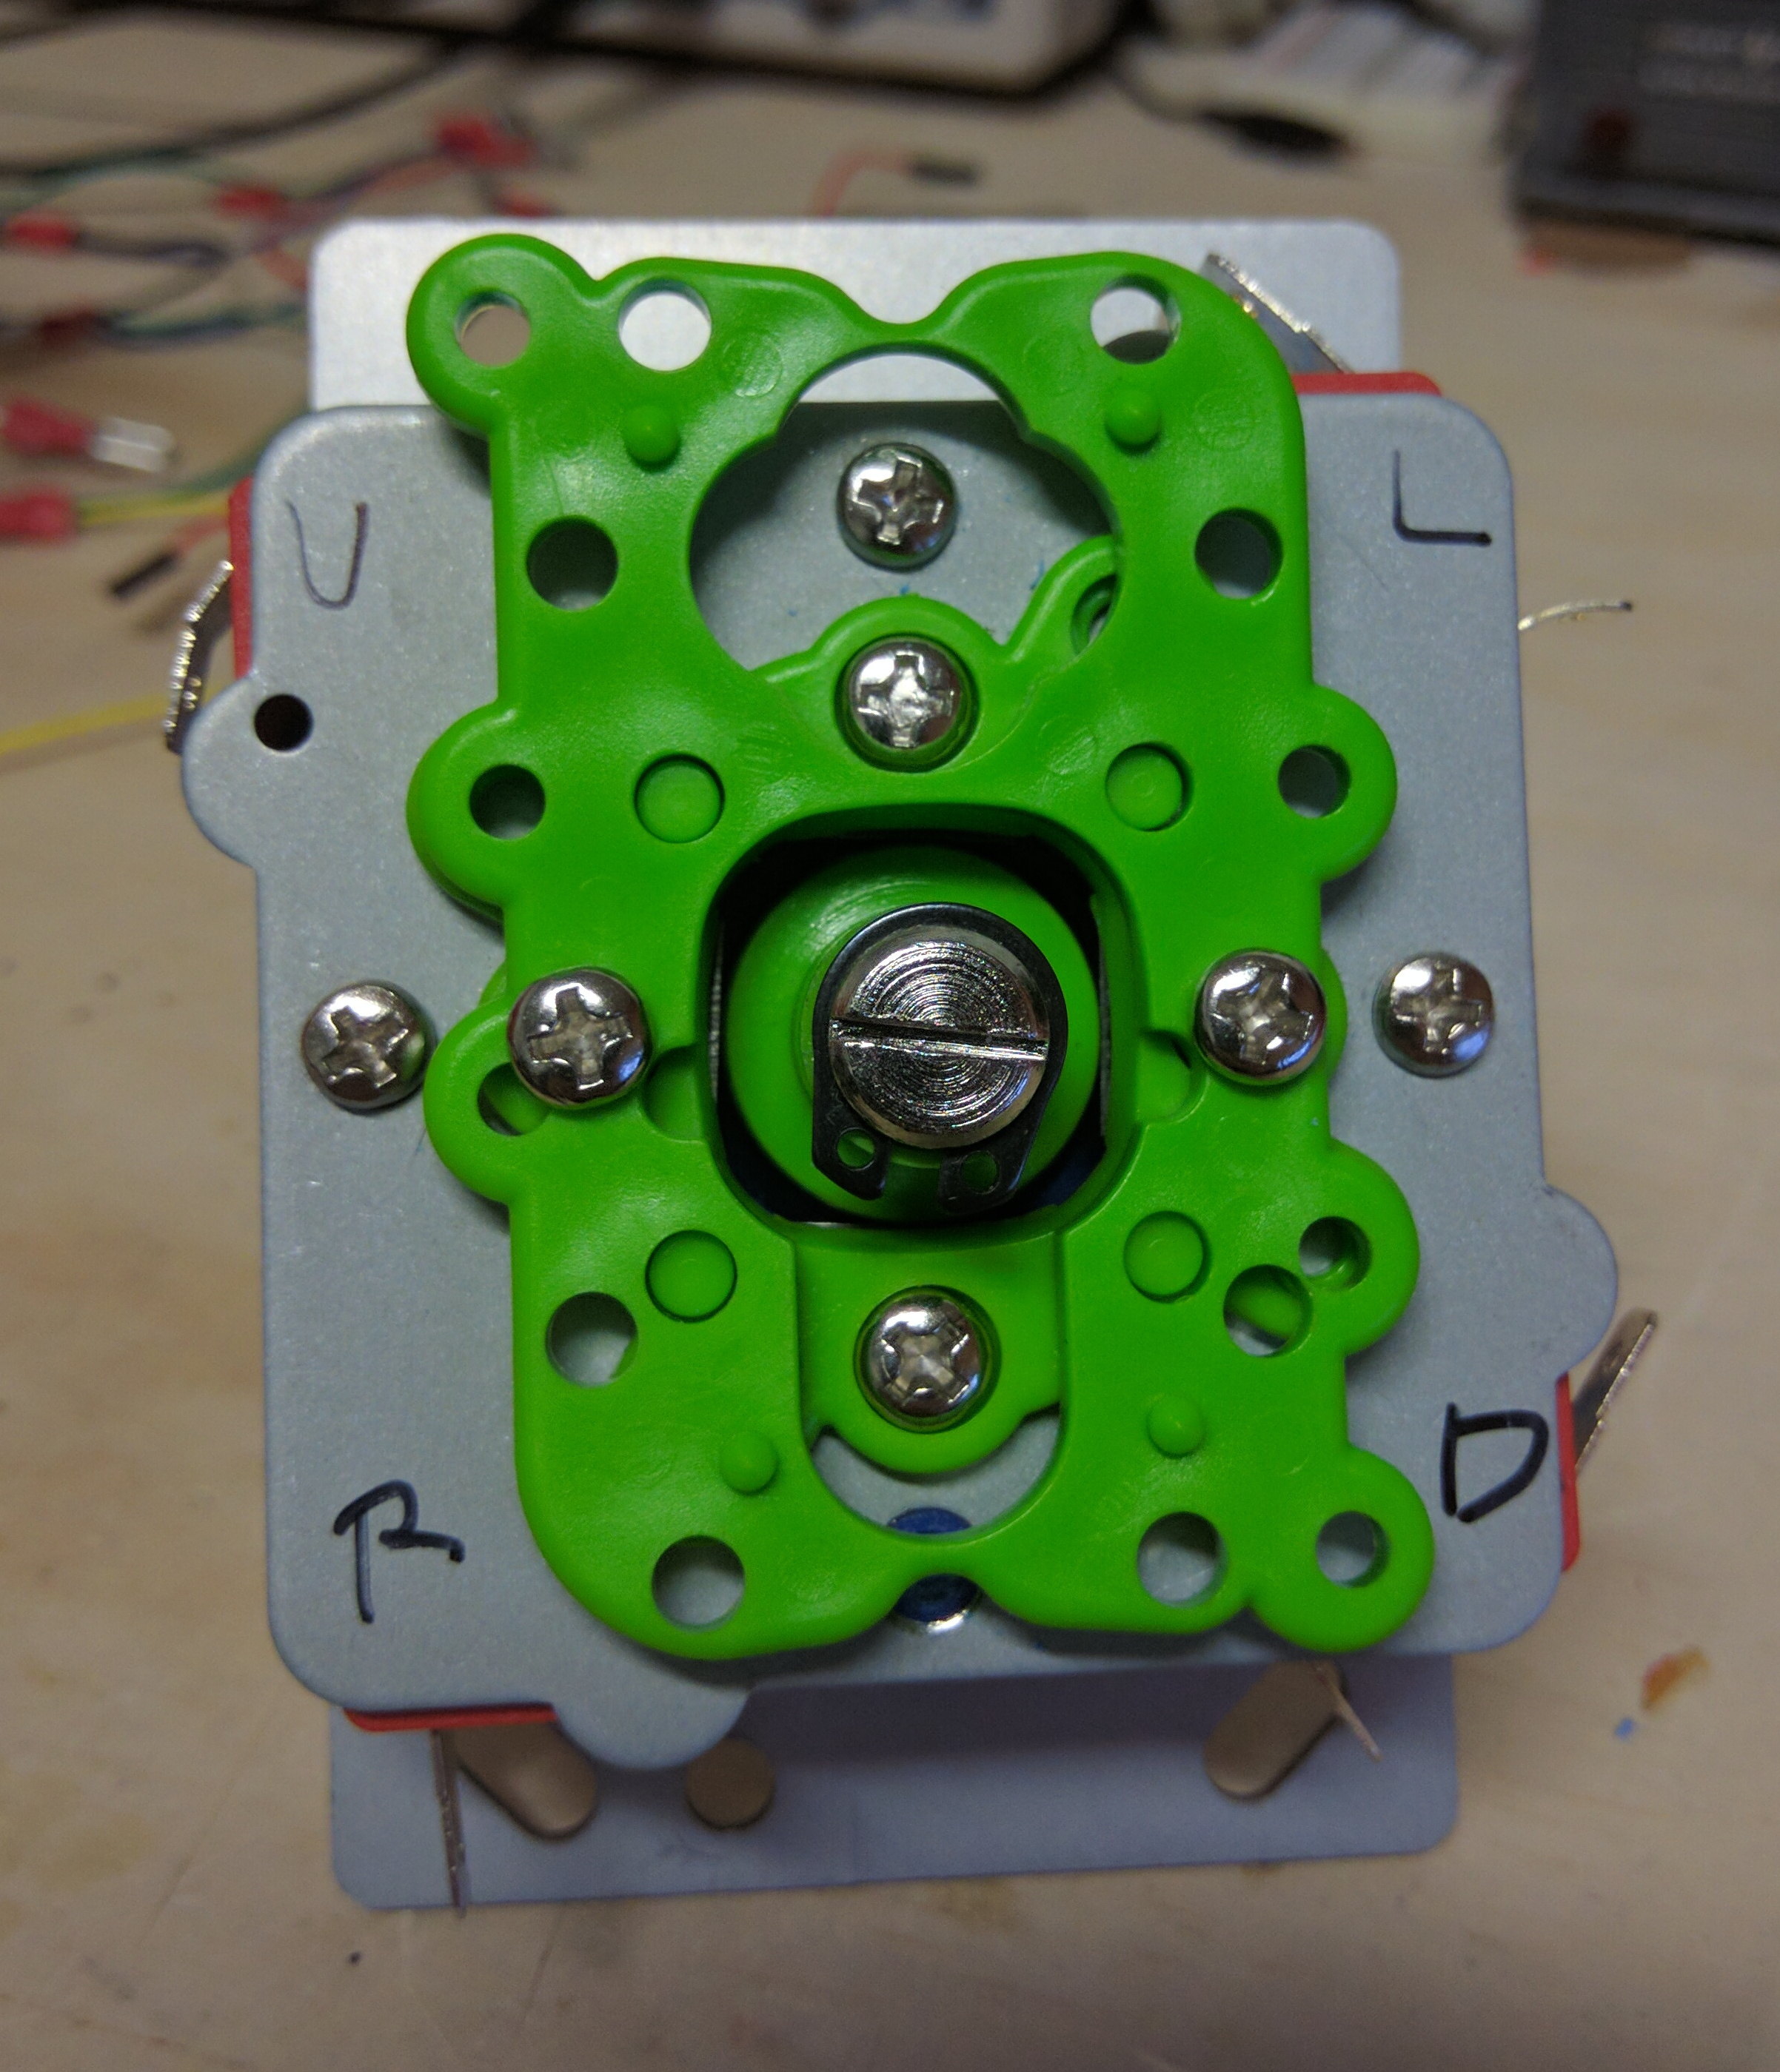
First, figure out which switch corresponds to Up, Down, Left and Right. To do this easily, you can unscrew the bottom metal plate like this:
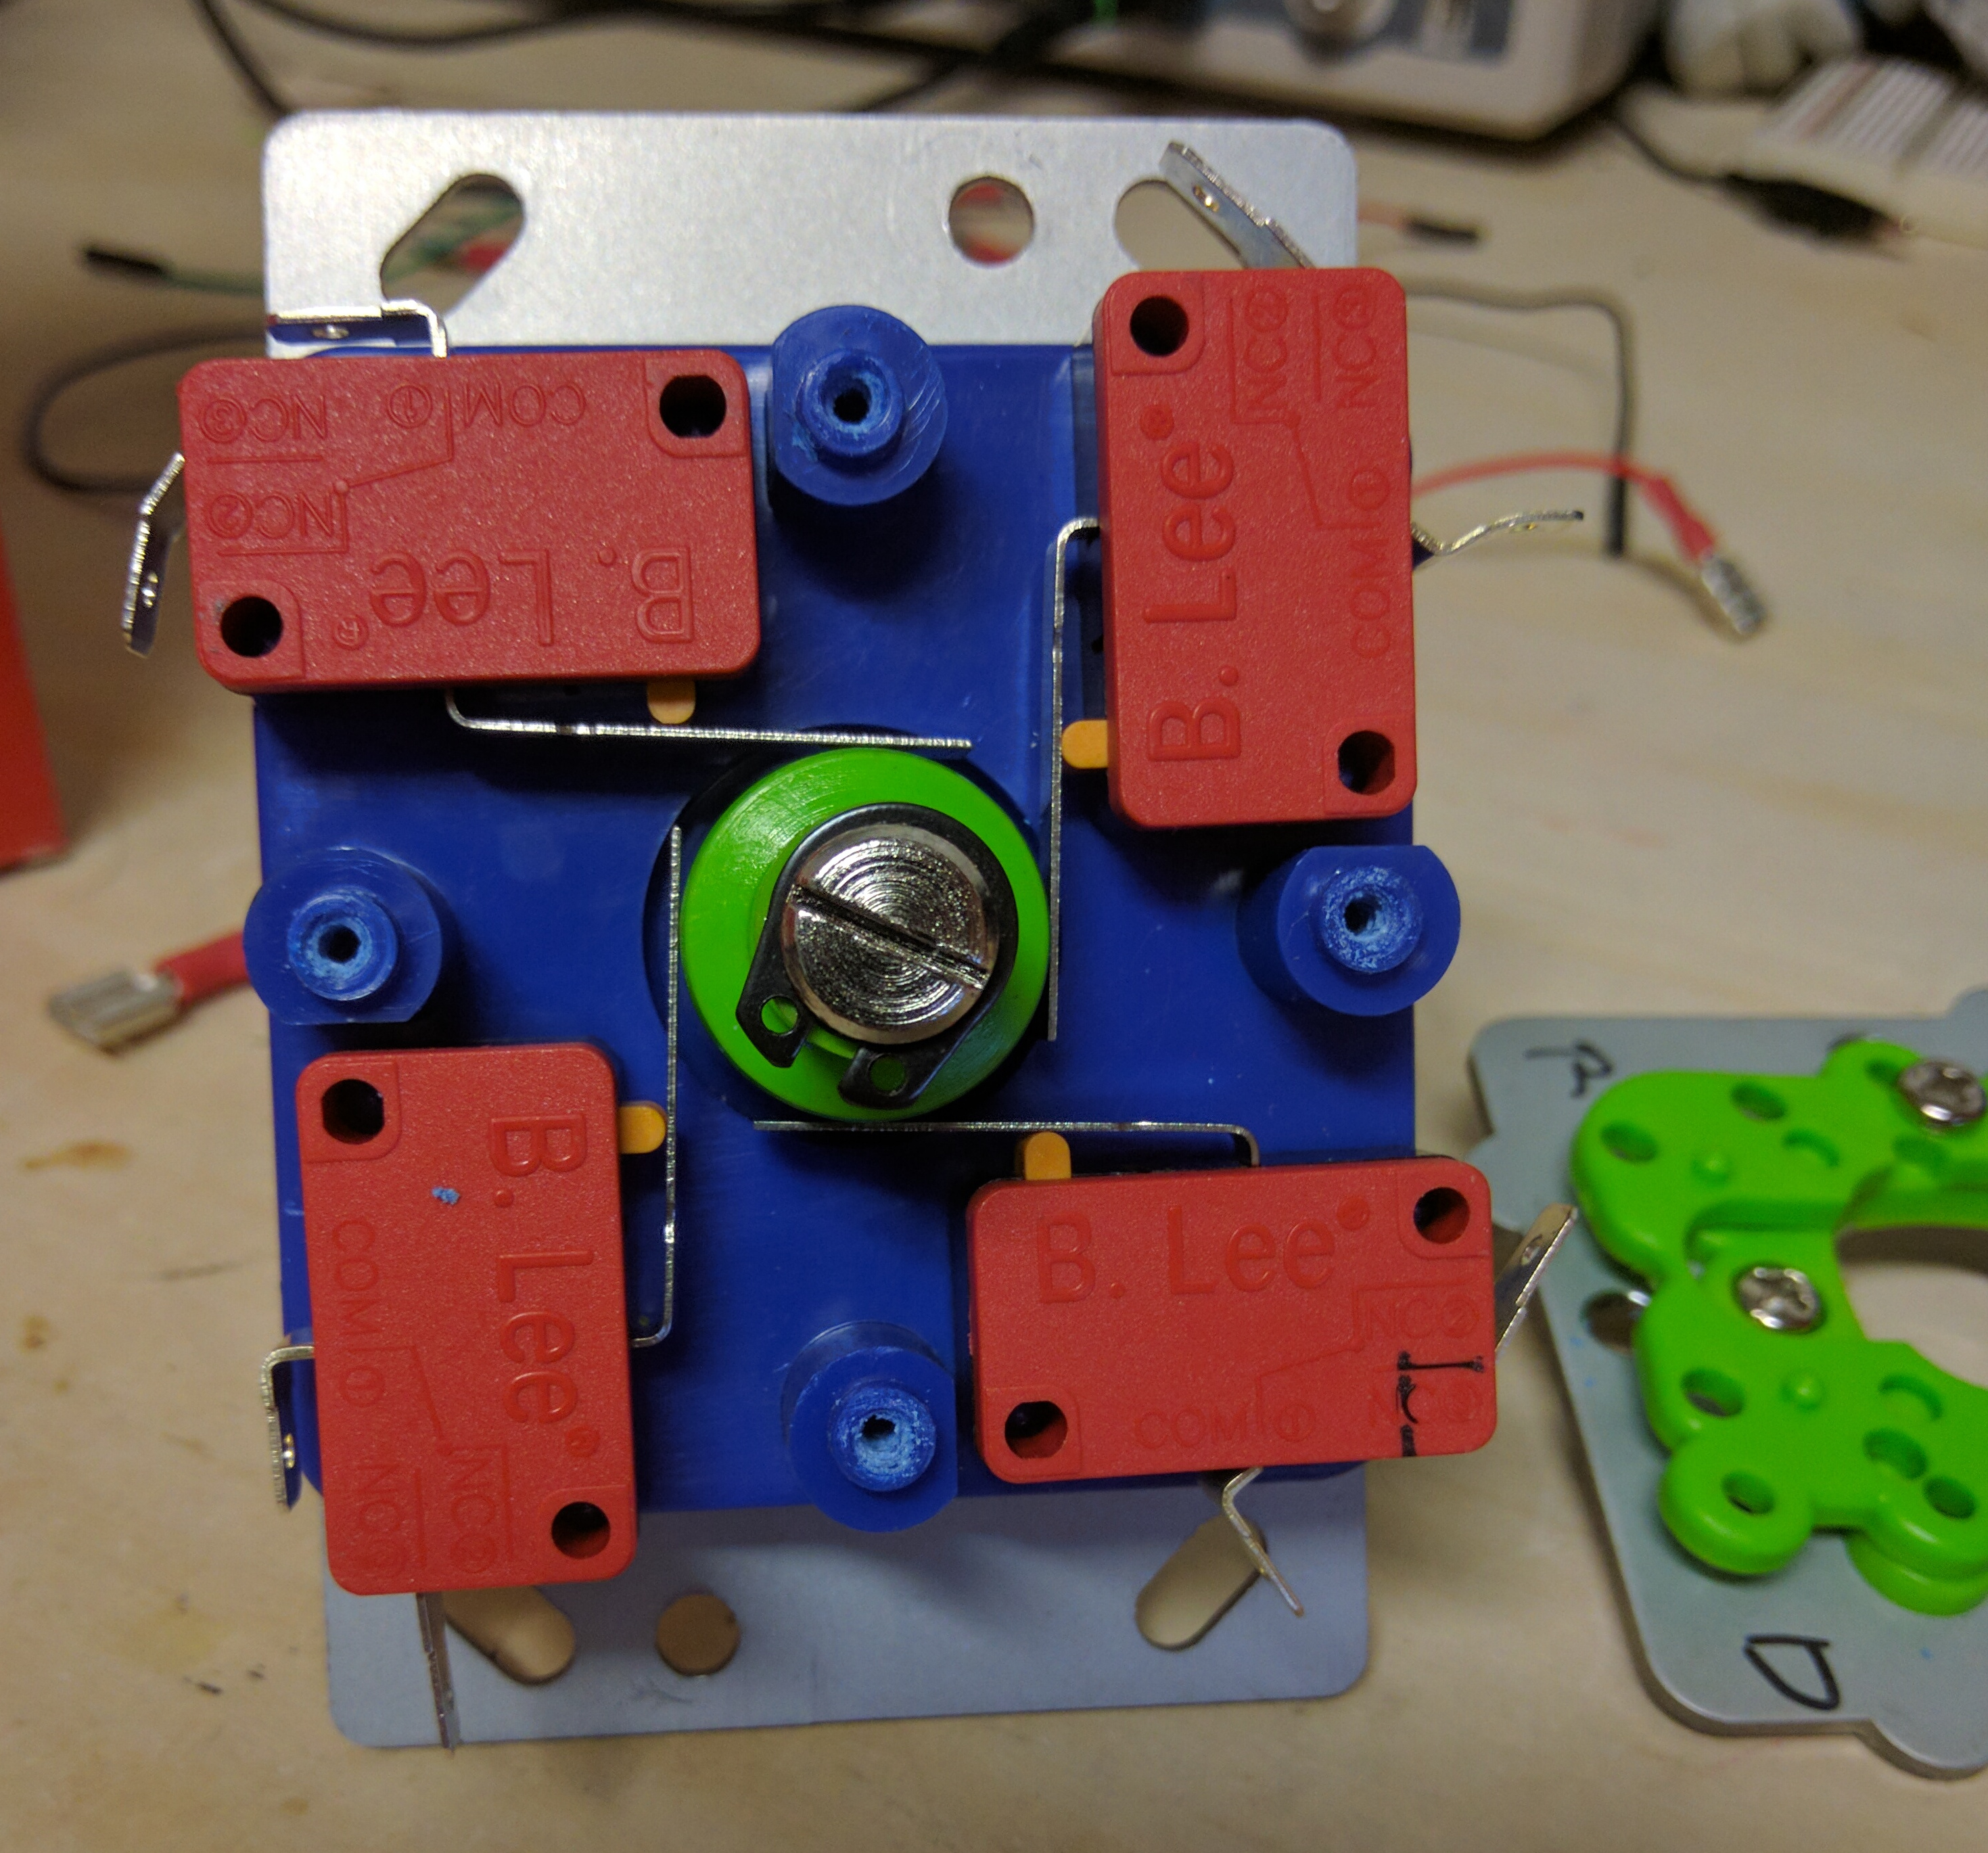
The switches will be exposed and you can test each direction. With the orientation shown holding the joystick to the left produces this result:
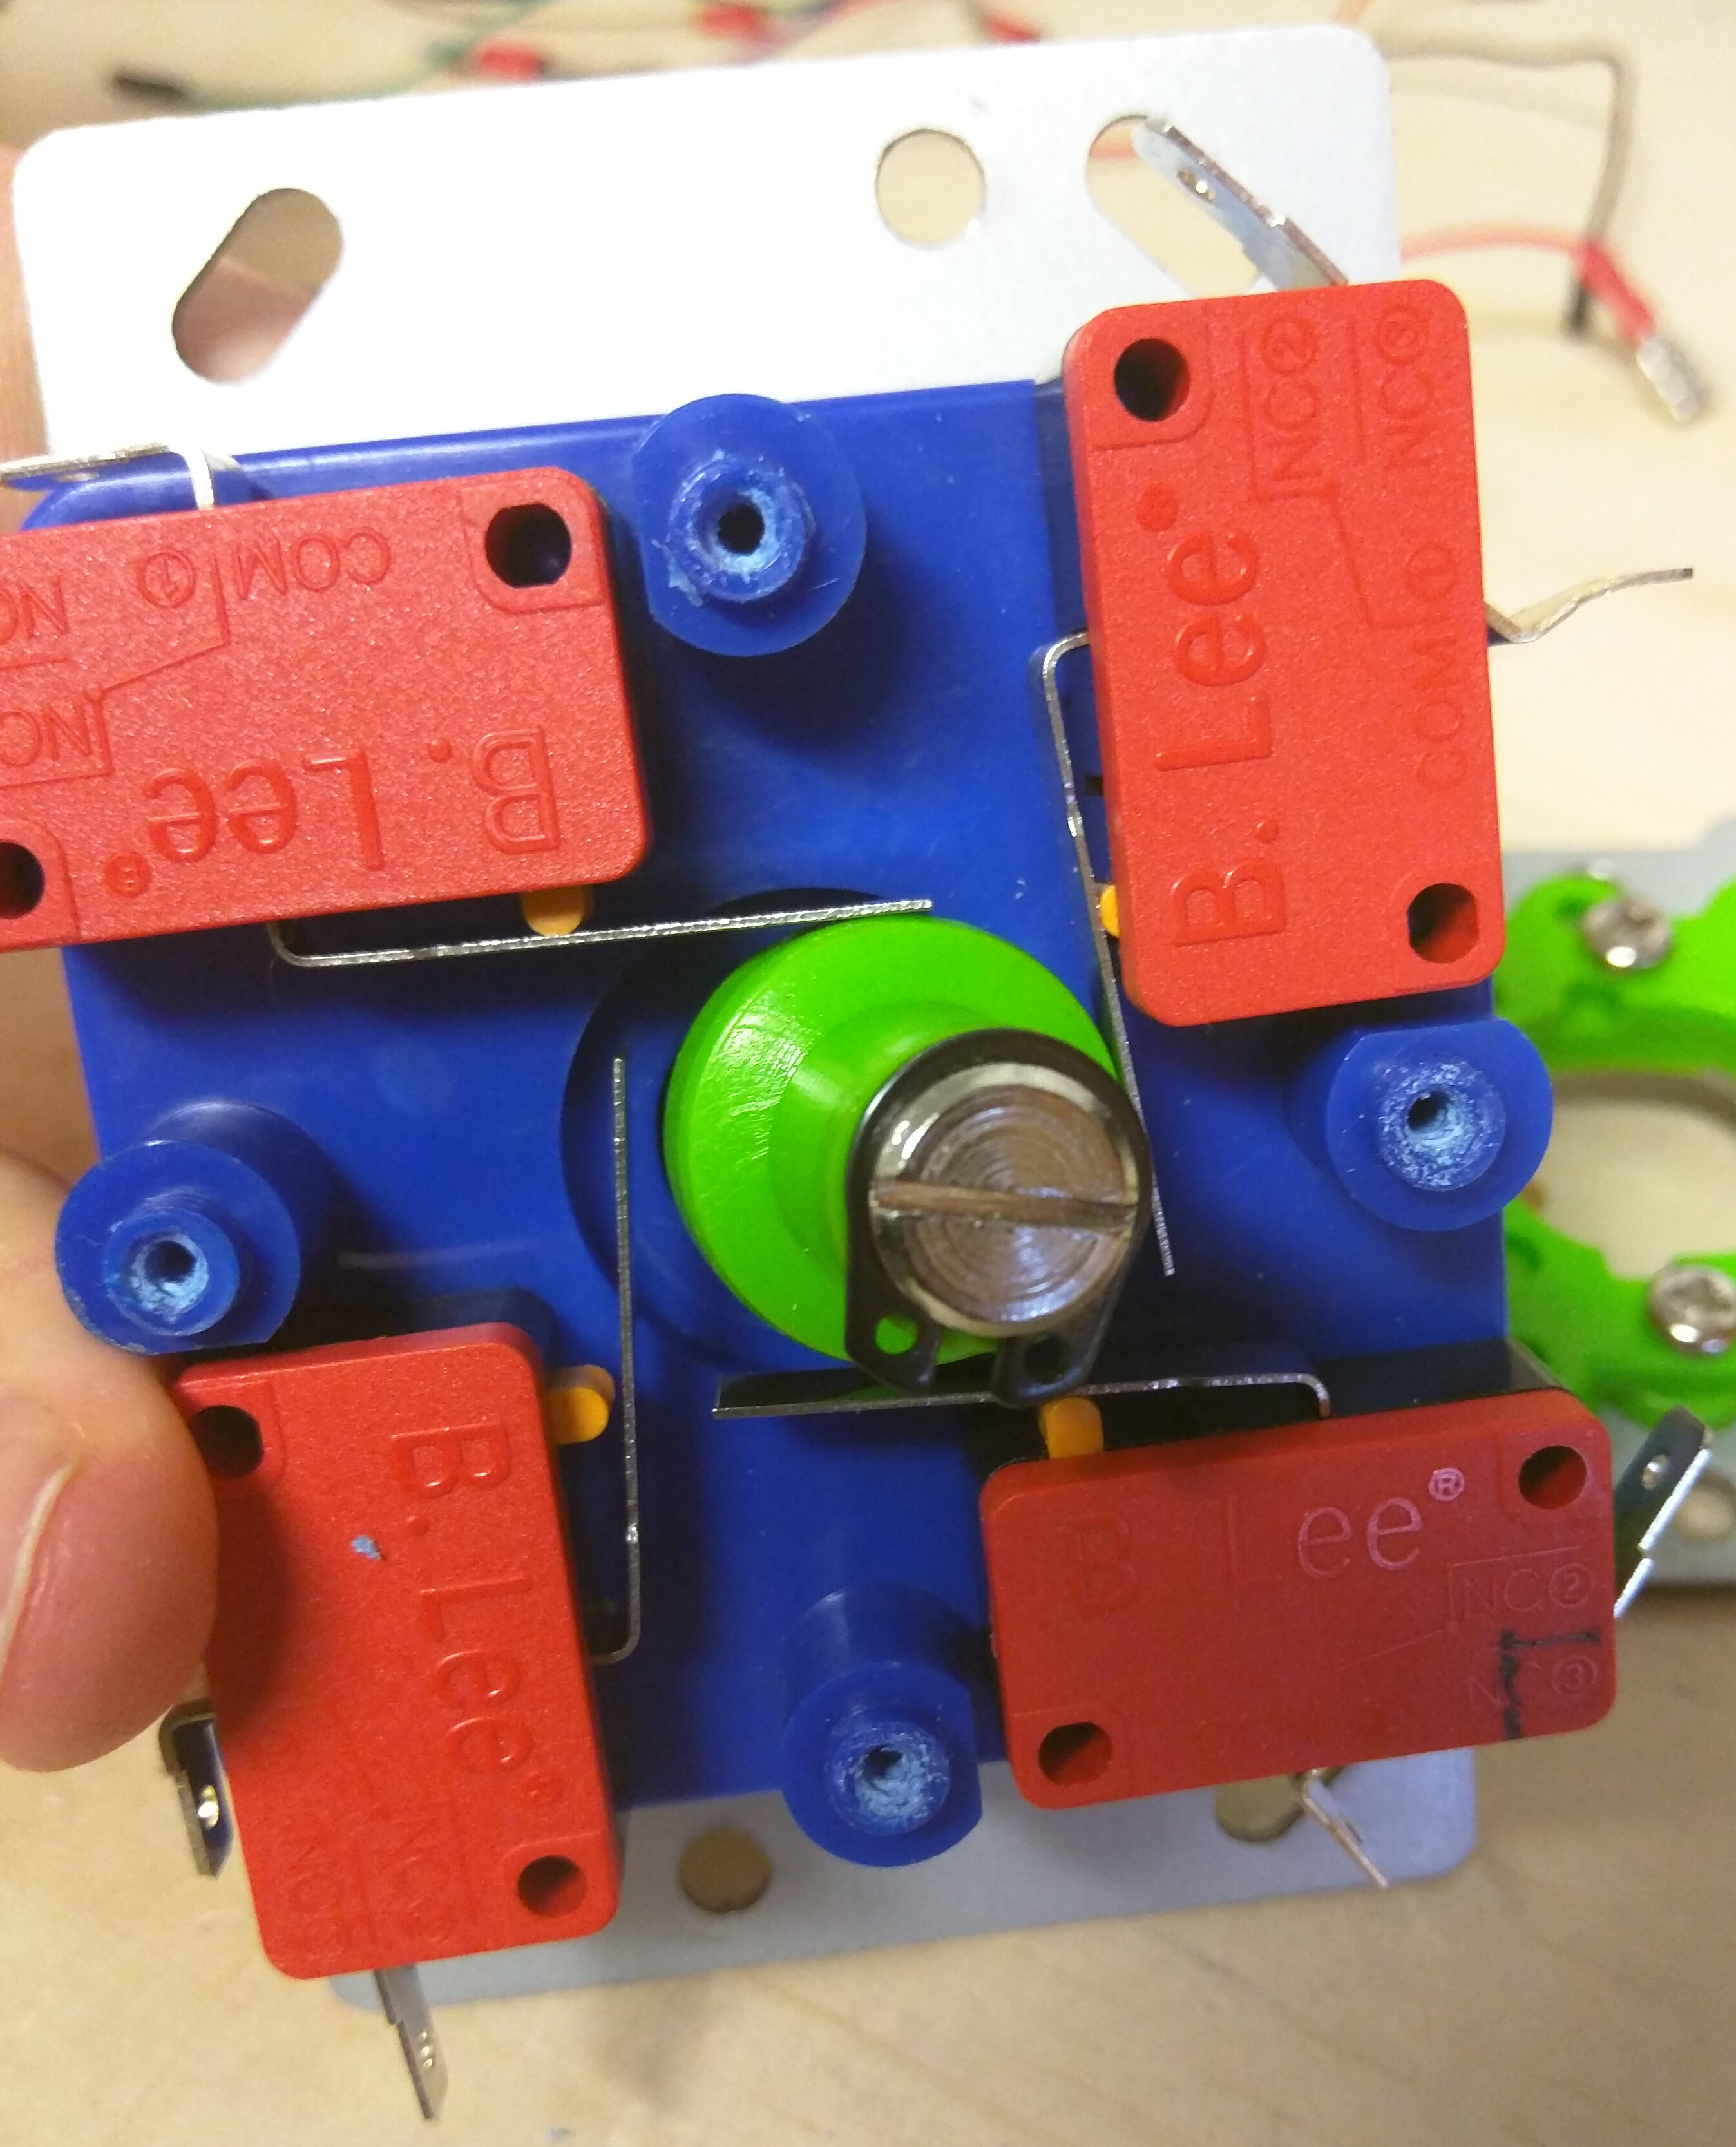
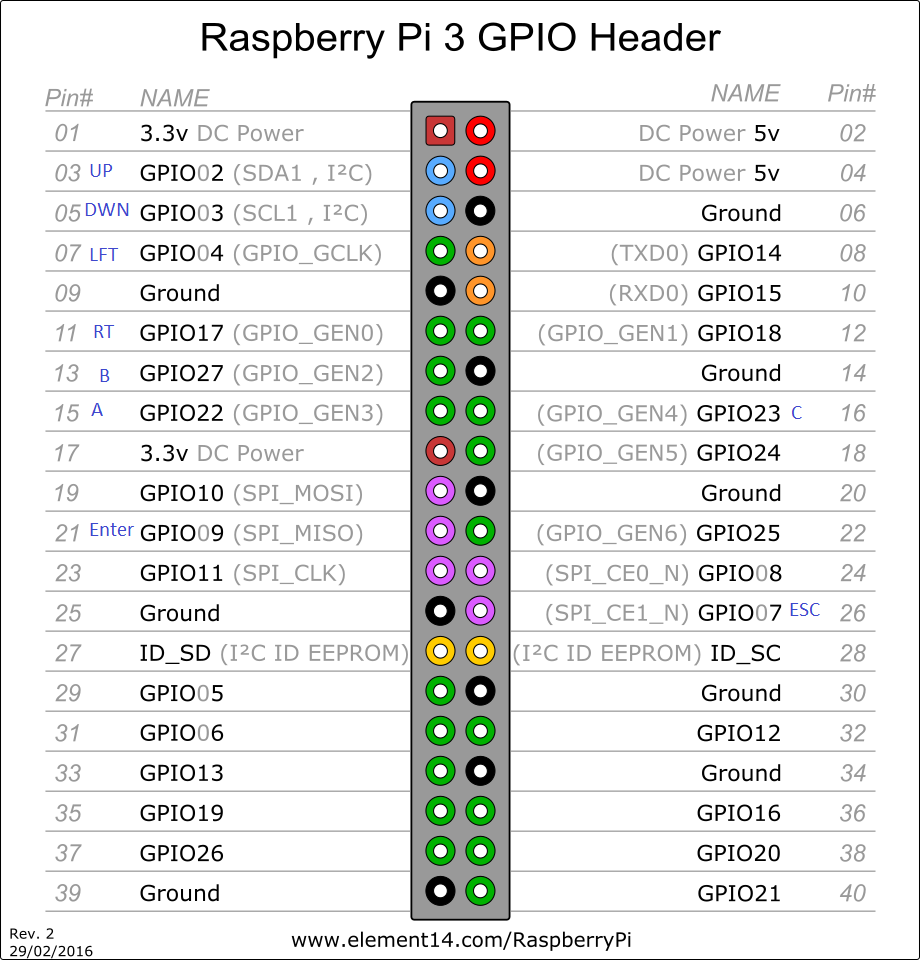
I labeled that top right switch "Left" which corresponds to GPIO Pin 7. Continue the same process for each direction and replace the bottom cover with the four screws along the outer edge.
Once you have the orientation, unscrew the red ball from the top of the joystick handle, and remove the black washer as well. Unscrew the top metal plate, and feed the joystick from under the box lid. Secure the joystick by screwing the metal plate on top of the box. You'll want to mark where those holes are and pre-cut a hole for each screw as well. Replace the black washer, and replace the red ball.
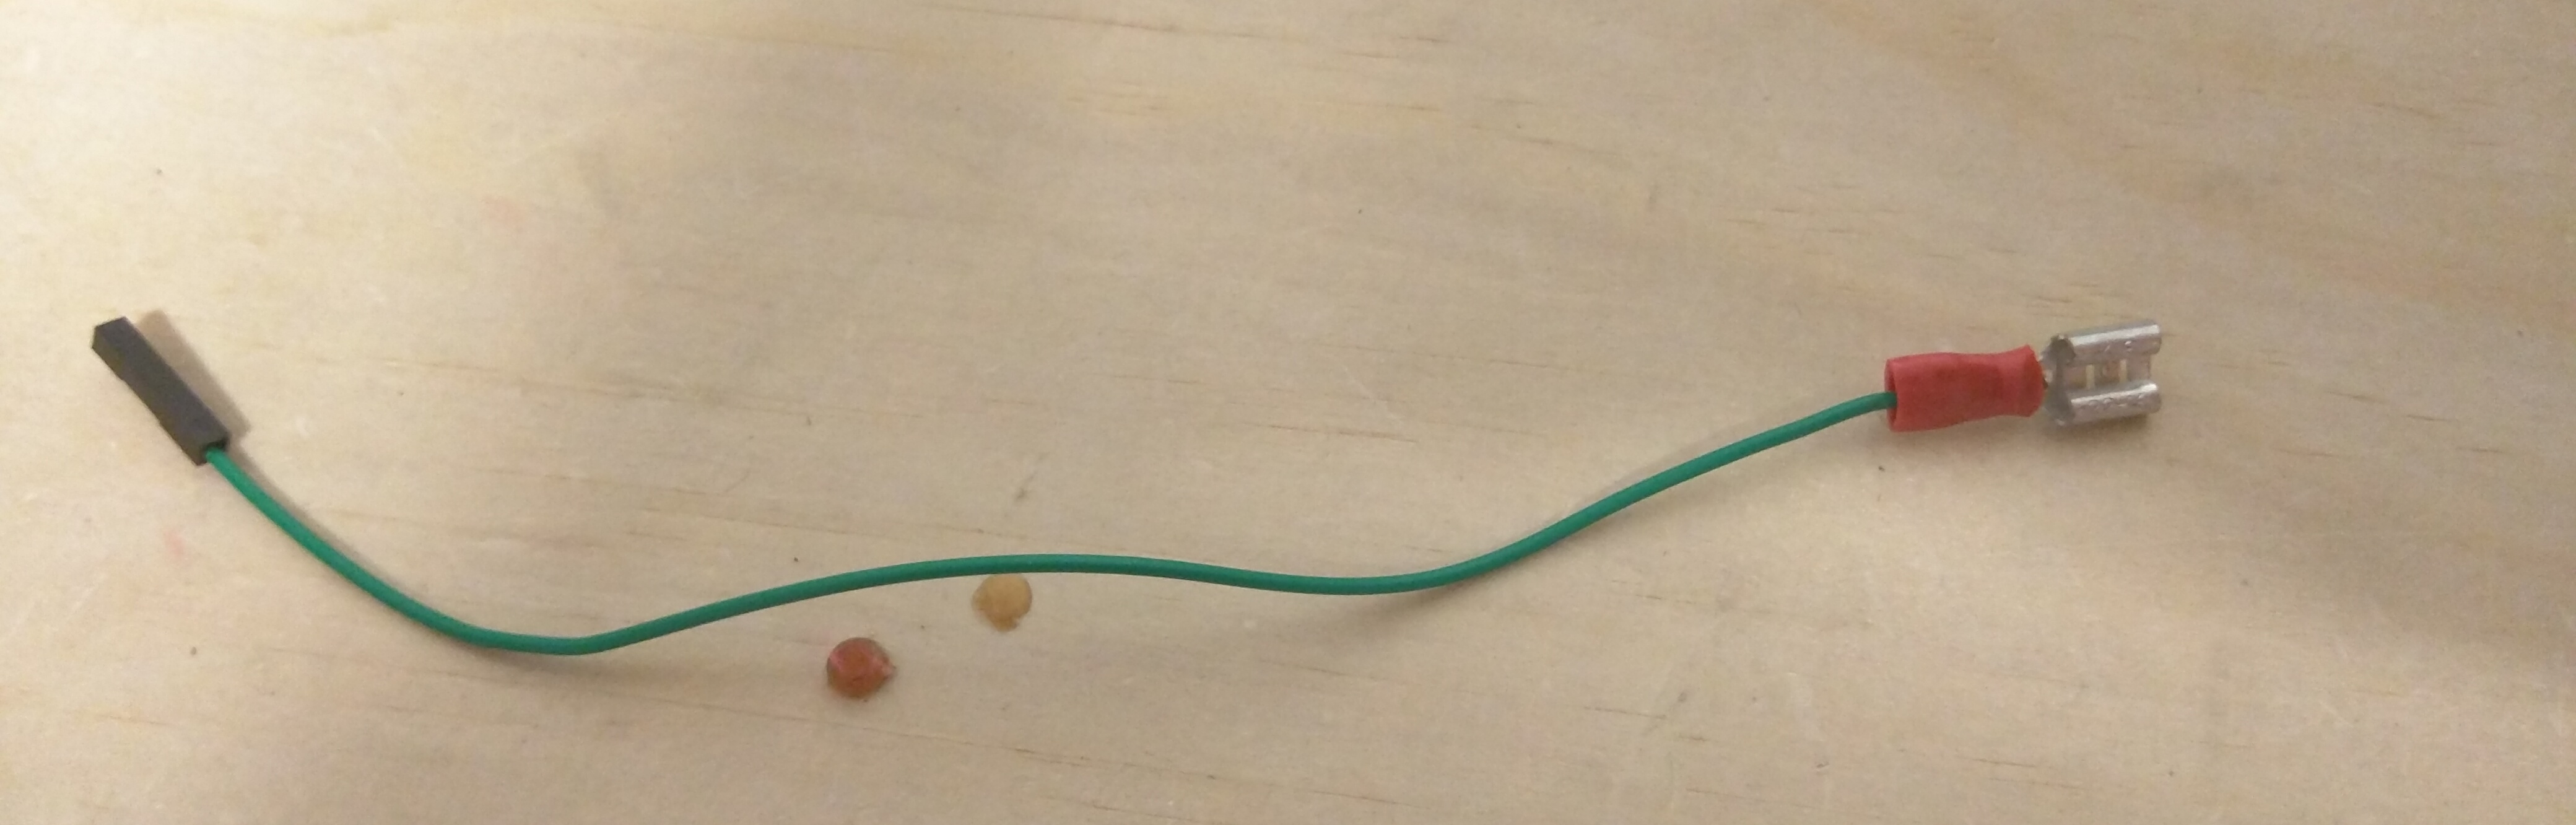
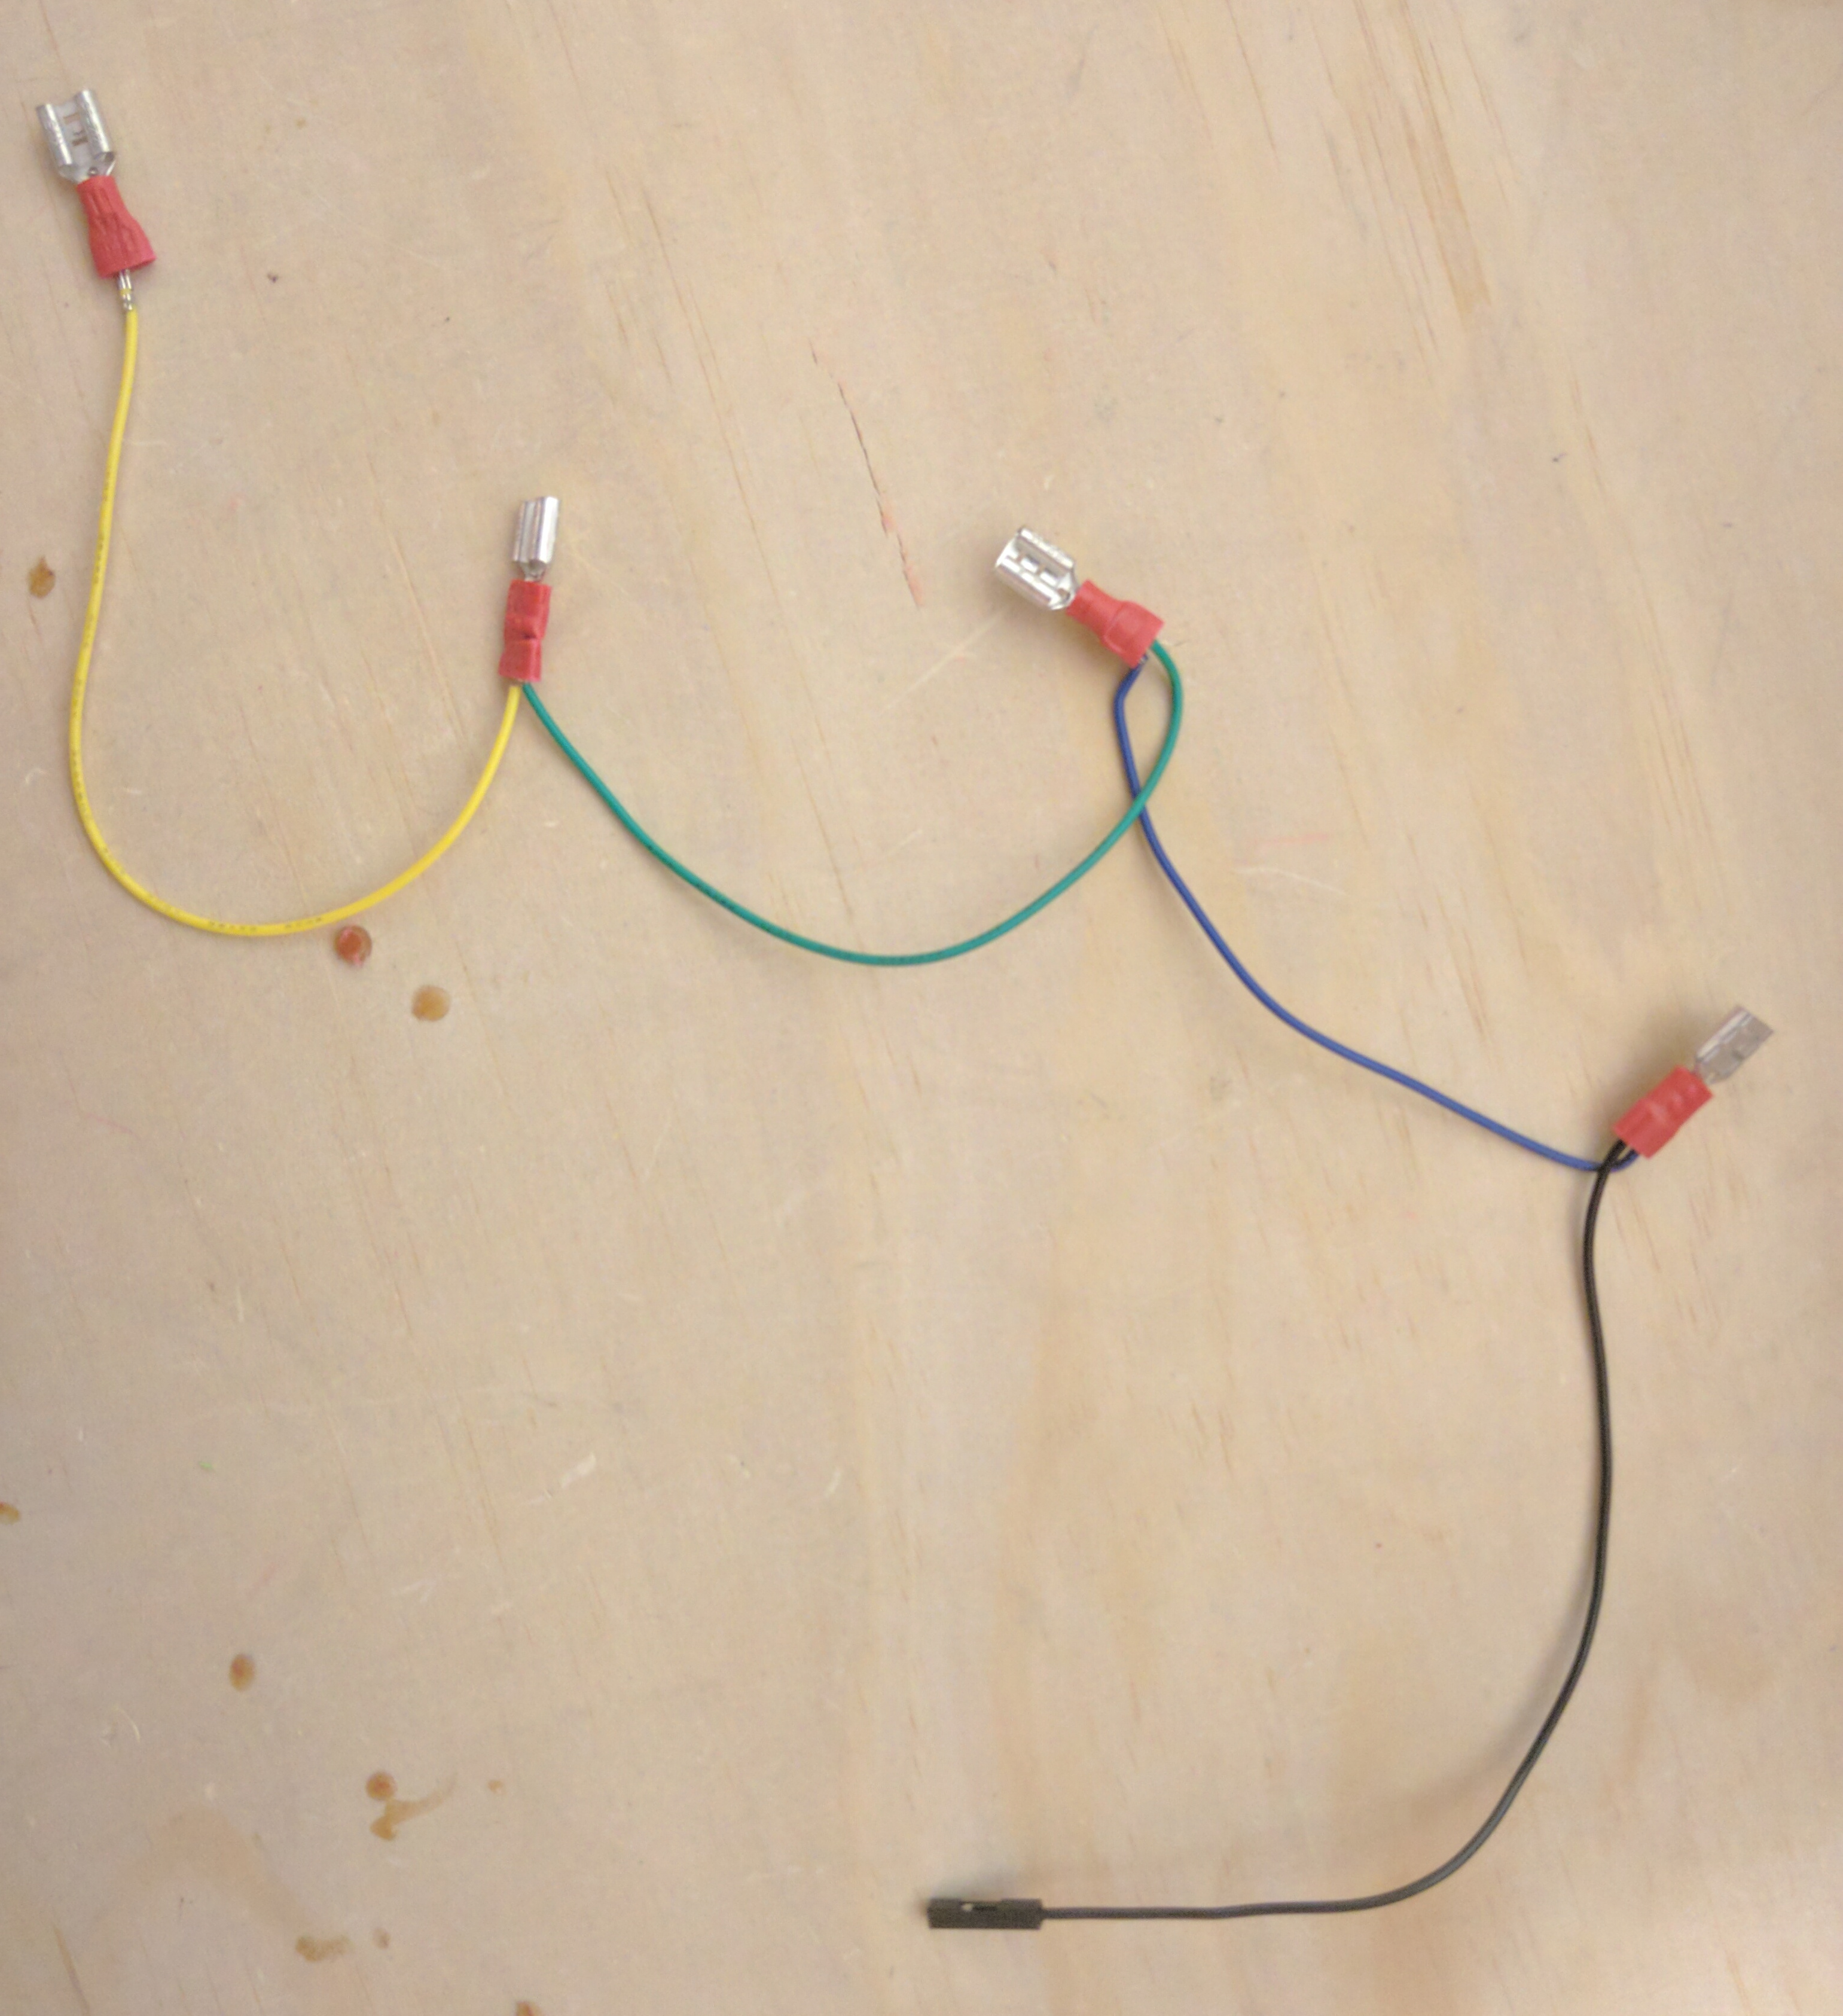
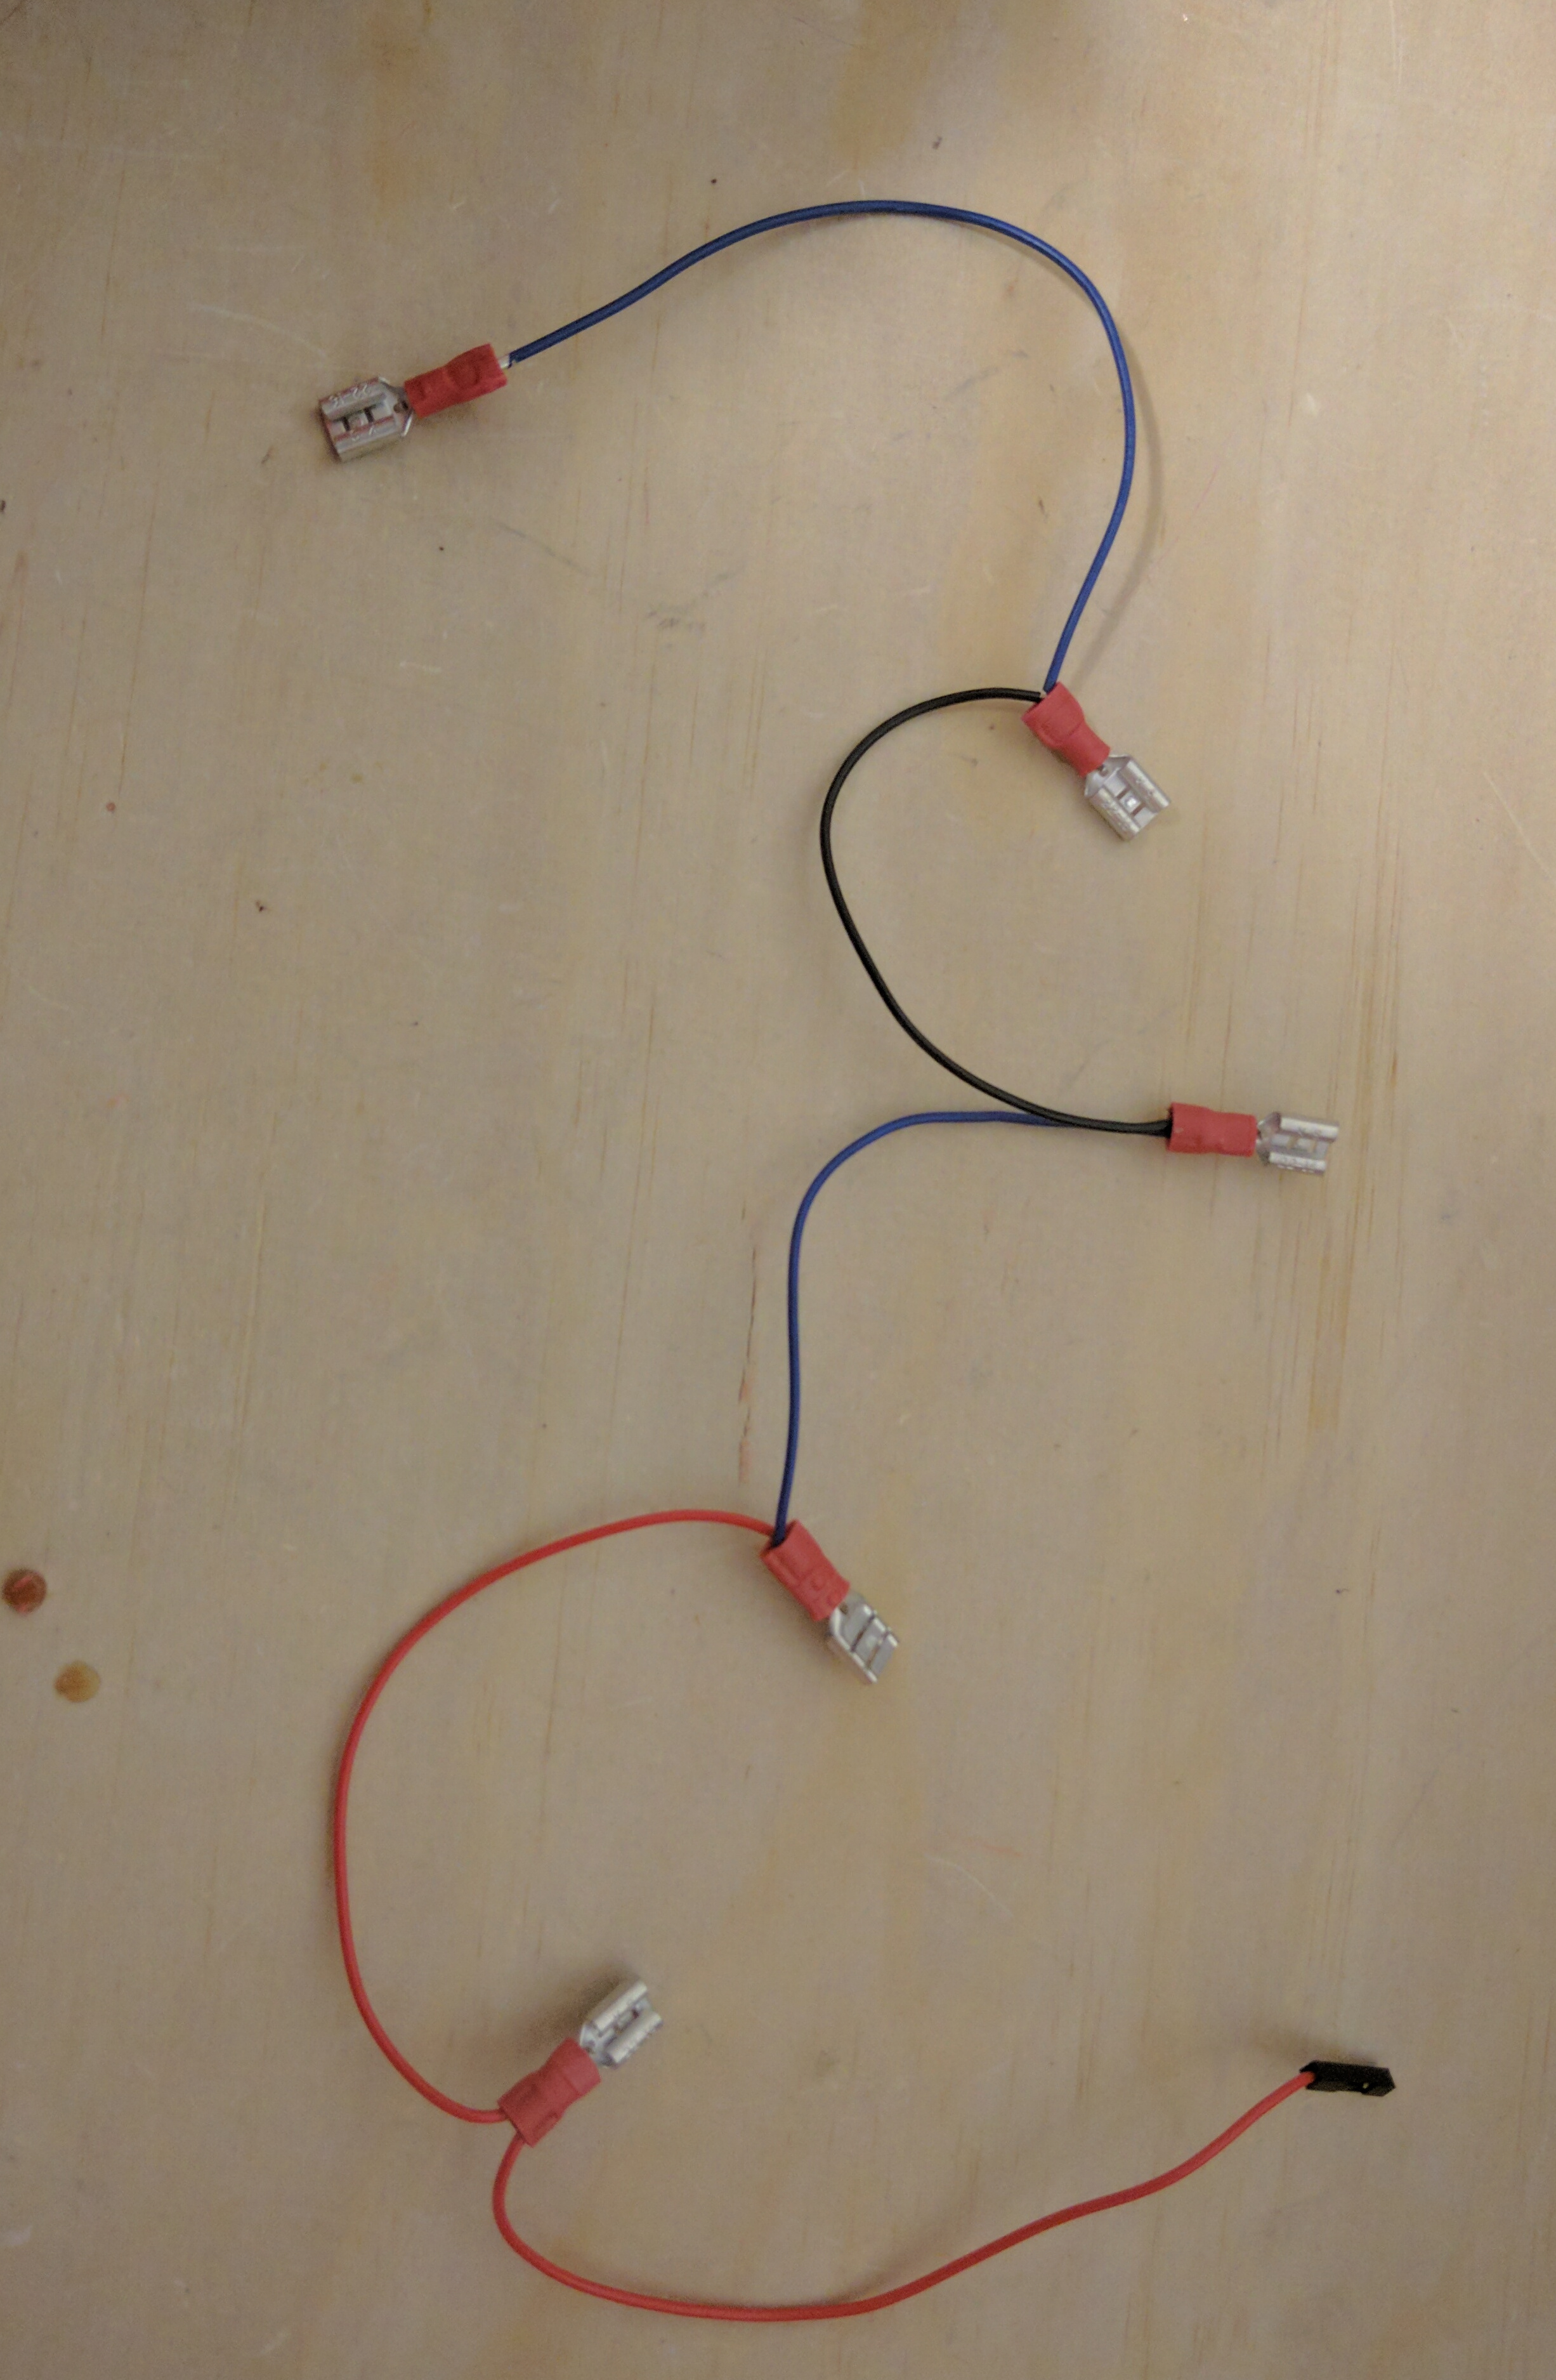
Wiring
You may have noticed some 6" strands of wire and 20 female quick disconnects. You will need a pair of crimpers or there may be a crimp tool on your wire strippers already. You will build two wiring harnesses for ground. One wiring harness will have five quick disconnects daisy chained together for the buttons, and the other will have four quick disconnects daisy chained together for each ground pin in the joystick. Then nine individual wiring harness for each button and direction on the joystick. The ground on the button switches are the lone tabs on the long side of the switch. The same goes for the joystick.
In the video, each button and direction was labeled along with its corresponding GPIO on the box with marker. Below is a picture of the mapping. The individual wiring harnesses are attached on the tab that is labeled "NO" (Normally Open). It is also labeled pin 3 on the switch. "Enter" is used as "start" and is mapped to Pin 21. "ESC" is used to back out of games and labeled "Select" (Trying to keep traditional controller vibes) on the box and it is mapped to pin 26.
See the image below for the correct orientation.
For the power, audio and monitor cables, cut three holes in the back of the box, and feed those cables through them. I'm using a set of powered speakers for audio. Close the box, and get ready to play.

Emulation Software
In the video above you saw how easy it was to get up and running on your gaming machine. Let's take a look at what's going on inside.
Besides powering the Pi and restarting the Pi after adding ROMs you will not have to do anything else to get started playing games. The Image on the SD card is called Porta Pi Aracde and is a collage of several programs compiled by Ryan Bates at Retro Built Games. The image contains RetroPie, Emulation Station, RetroArch and Retrogame.
Power the Pi, and connect a monitor through an HDMI cable. Once it boots up you should see the RetroPie home screen, then the Emulation Station home screen and then a menu which shows you the available system emulators and how many games you have in each emulator. Now is when you'll want to get familiar with navigating through the menu and add your roms. You can fully navigate through the menus with your newly assembled gamepad, or you can use a keyboard.
A Little Background on the SD Card Image
If you need a fresh copy of Porta Pi arcade click the button above to navigate to Retro Built Games downloads page.
RetroPie is backbone of your retro-gaming machine. It can be installed on top of an OS like Rasbian. We left off the OS so you can decide which one you'd like to add or if you need one at all.
If you decide to add an OS, you can exit the emulator, and enter the Linux GUI by pressing F4. This brings you to a terminal window, and typing the command sudo startx starts the GUI.
To get back to the emulator, log out of the Linux GUI, and type the command emulationstation in the terminal window.
Without Rasbian the only commands you need are the F4 key to enter terminal window and emulationstation to return to the emulator.
Emulation Station is the graphical front end that gets you easy access to your favorite retro games without a keyboard. Once you have built your controller, you will have all the buttons necessary to navigate through Emulation Station and play your legally obtained roms.
RetroArch exposes the functionality of a game or emulator. It is the front-end for libretro and can do things like raw video recording and netplay. It also allows for universal controls to be programmed -- it currently is for this tutorial. This means that the controls set for ESC, Enter, Jump, Shoot, etc. are seen across all games in all emulators - you won't have to set up your game pad every time you enter a new emulator.
Retrogame is a great tool which allows Raspberry PI GPIO-to-USB utility for emulators written by Phil Burgess for Adafruit. This is how the button mashing gets registered as keyboard presses. To change where the buttons are mapped to or to add more buttons head over to Retro Built Games .
Adding Roms
The easiest way to add roms is to use a USB Thumb Drive or SD Card with adapter. Format the USB drive to get a fresh drive. Add a folder called 'retropie', and insert it into your Raspberry Pi 3. Wait a few minutes, or look for the flashing light on your USB to stop.
Pull out the USB drive, and plug it back into your computer. The 'retropie' folder will now have three sub folders: 'BIOS', 'Configs' and 'roms'. Save your roms into the appropriate folder within the 'roms' folder.
Put the USB drive back in the Pi, and wait once more for the file transfer to finish. The roms are automatically saved to the correct emulator folder. You now need to restart your Raspberry Pi.
Plug in a keyboard, and Hit F4 to exit emulation station. From the terminal window, type the command sudo reboot to restart your station. You should now see the menu expanded based on the roms you saved. Thus, if you added NES roms, there will now be an NES option in the menu. Instructions on obtaining roms is beyond th scope of this tutorial. You should only be adding legally sourced roms onto your Raspberry Pi gaming station.
Test
Once you have your buttons placed, the wiring finished and your roms installed, it is time to test your gamepad. Power your Raspberry Pi, and wait for the emulation station menu screen. Use the joystick to navigate through the different emulators. Button A will act as select or Enter in the menu, and B will act as a back button. The select button is escape for when you want to change games and get back to the main menu from within a game. From within a game A, B, & C will act as the normal fight and special buttons.
If you want to change the keyboard mapping, add a player 2, or add a coin acceptor head over to Retro Built Games and check out the Porta Pi Tips for extra help or inspiration.
For more in-depth instructions on how to get started with RetroPie, check out their extensive guide found on GitHub.
Audio Set Up
The simplest way to get audio for your arcade machine is to plug powered speakers into the audio jack. You can also change the settings in RetroPie. To use headphones, navigate to the RetroPie emulator and press A. Select Audio in the menu by pressing A again. Select option 2 to use headphones. select Option 3 to use HDMI. To get a portable solution-if you are making a cabinet, select option 4 and check out SparkFun's Audio amplifier kit. Just be sure to tie ground from the amp kit to a ground pin.
Resources and Going Further
Go beyond the box, and customize your own arcade cabinet. Retro Built Games is a great resource for building arcade cabinets, navigating through RetroPie, EmulationStation, RetroArch and Retrogame, expanding roots to increase SD space, adding roms and much more. If you are having any trouble, the Forums on this site are excellent. There are also instructions for adding a player two, adding a coin acceptor, free plans for a MiniCade, and then random cool stuff like a Vending Machine and a folding dog ramp. Give this gaming maker some love.

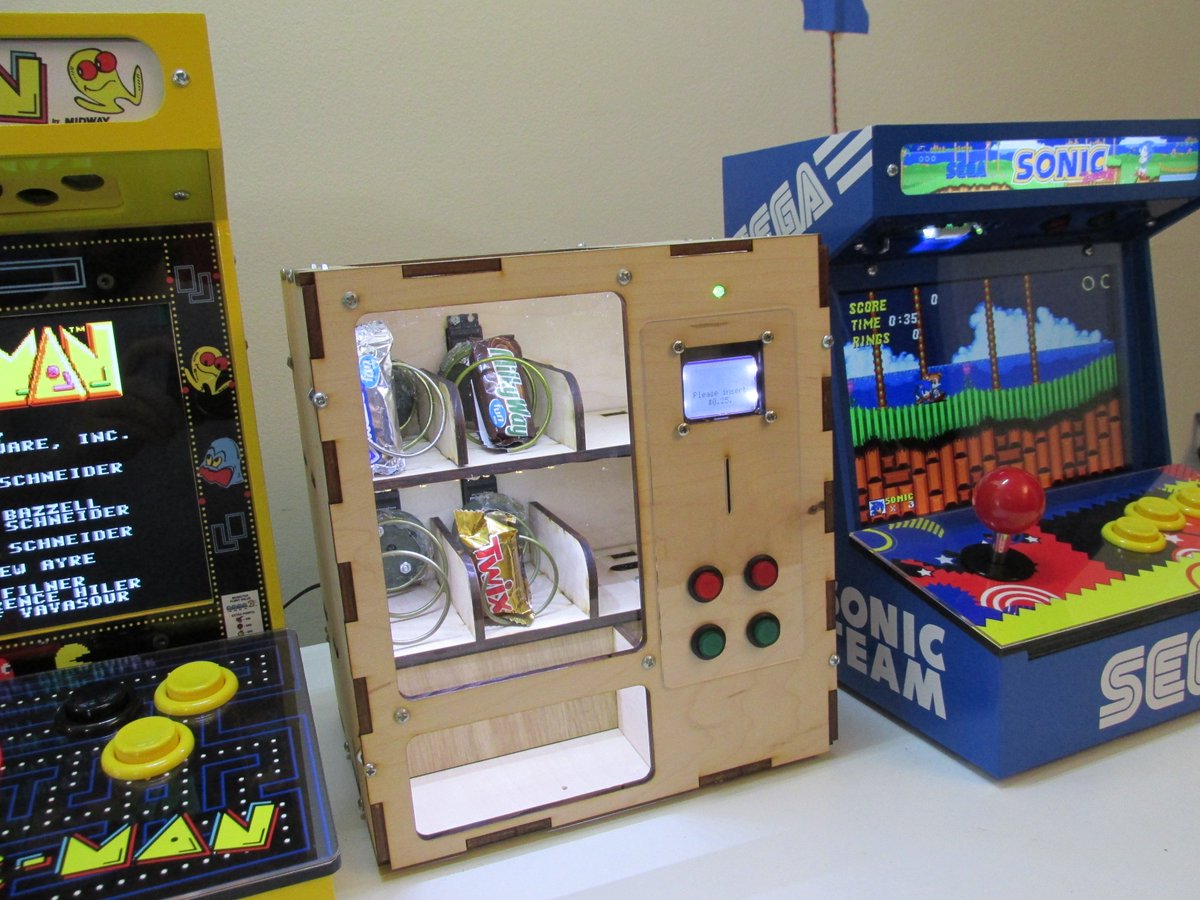
A table top vending machine seems like a worthy investment.
Or check out these blog posts for ideas.